FAQ iPad
In general, Digital Planner is a PDF file with hyperlinks adapted for tablets, phones, and personal computers. So, you can easily navigate between the days by clicking calendar dates, and of course between all sections! Our Digital Planners are customizable, and you can make your own planner only with layouts you need in the most suitable order. It's fast and simple.
After purchase, you'll access to planner page and can configure all parameters. Your order allows you to configure and download the file as many times as you need. For example, you can download file with default configuration, then change something and compare to find the best variant.
So let's start!
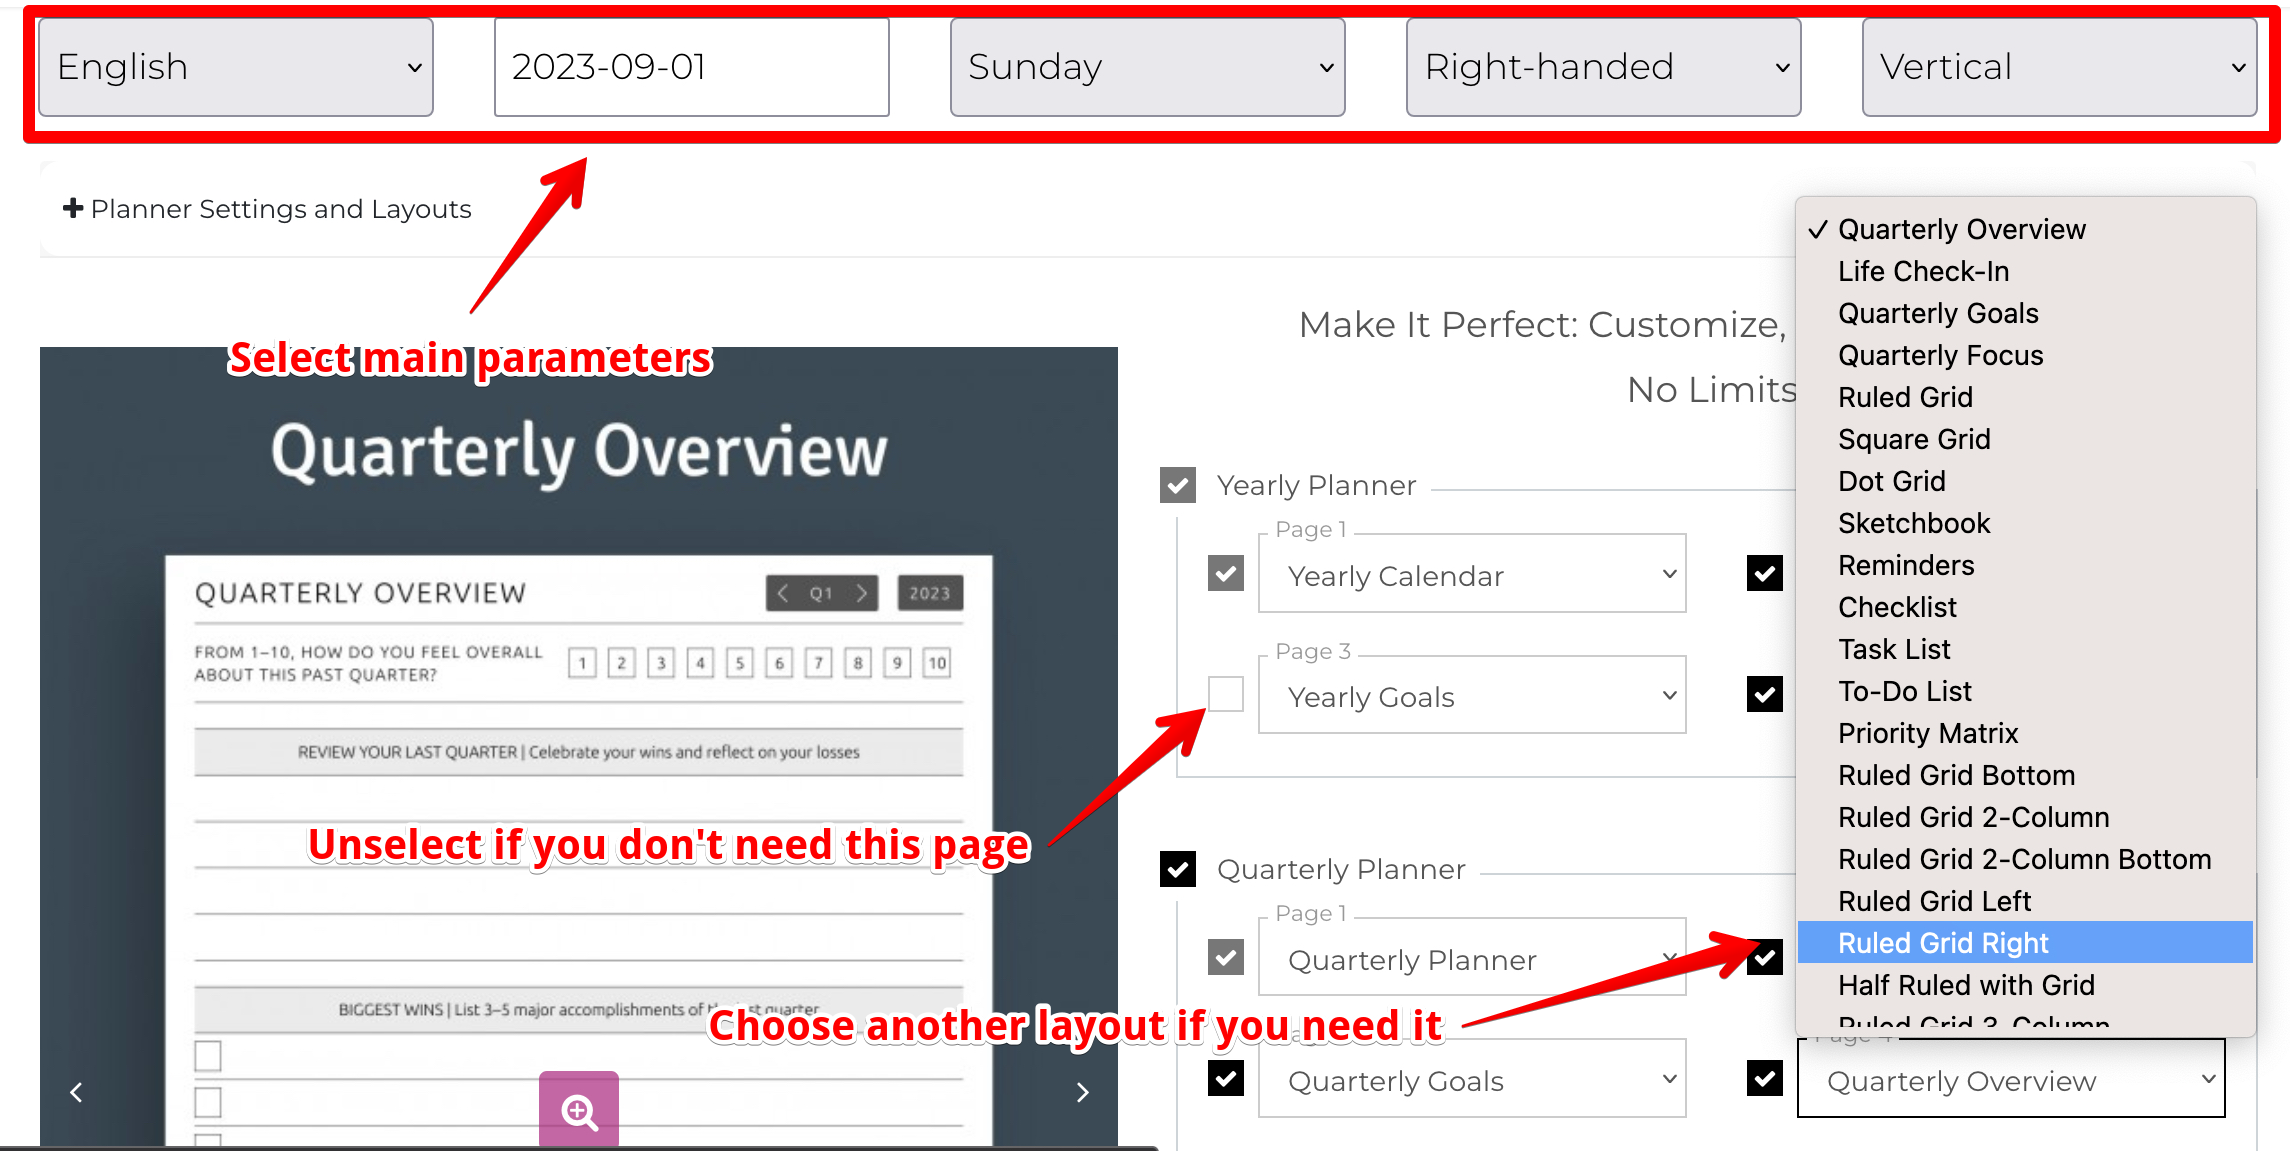
On the top you see main settings like start date, planner view (vertical or horizontal), etc. Select what you need and look on the right side of the page. Here you see a selection of layouts on pages. For example, we have 4 hyperlinked yearly pages, but you need 3. Just uncheck spare page. And on the quarterly section, you don't need a Quarterly Overview layout. Click on it and select more suitable from the list. On the left side you can see preview.
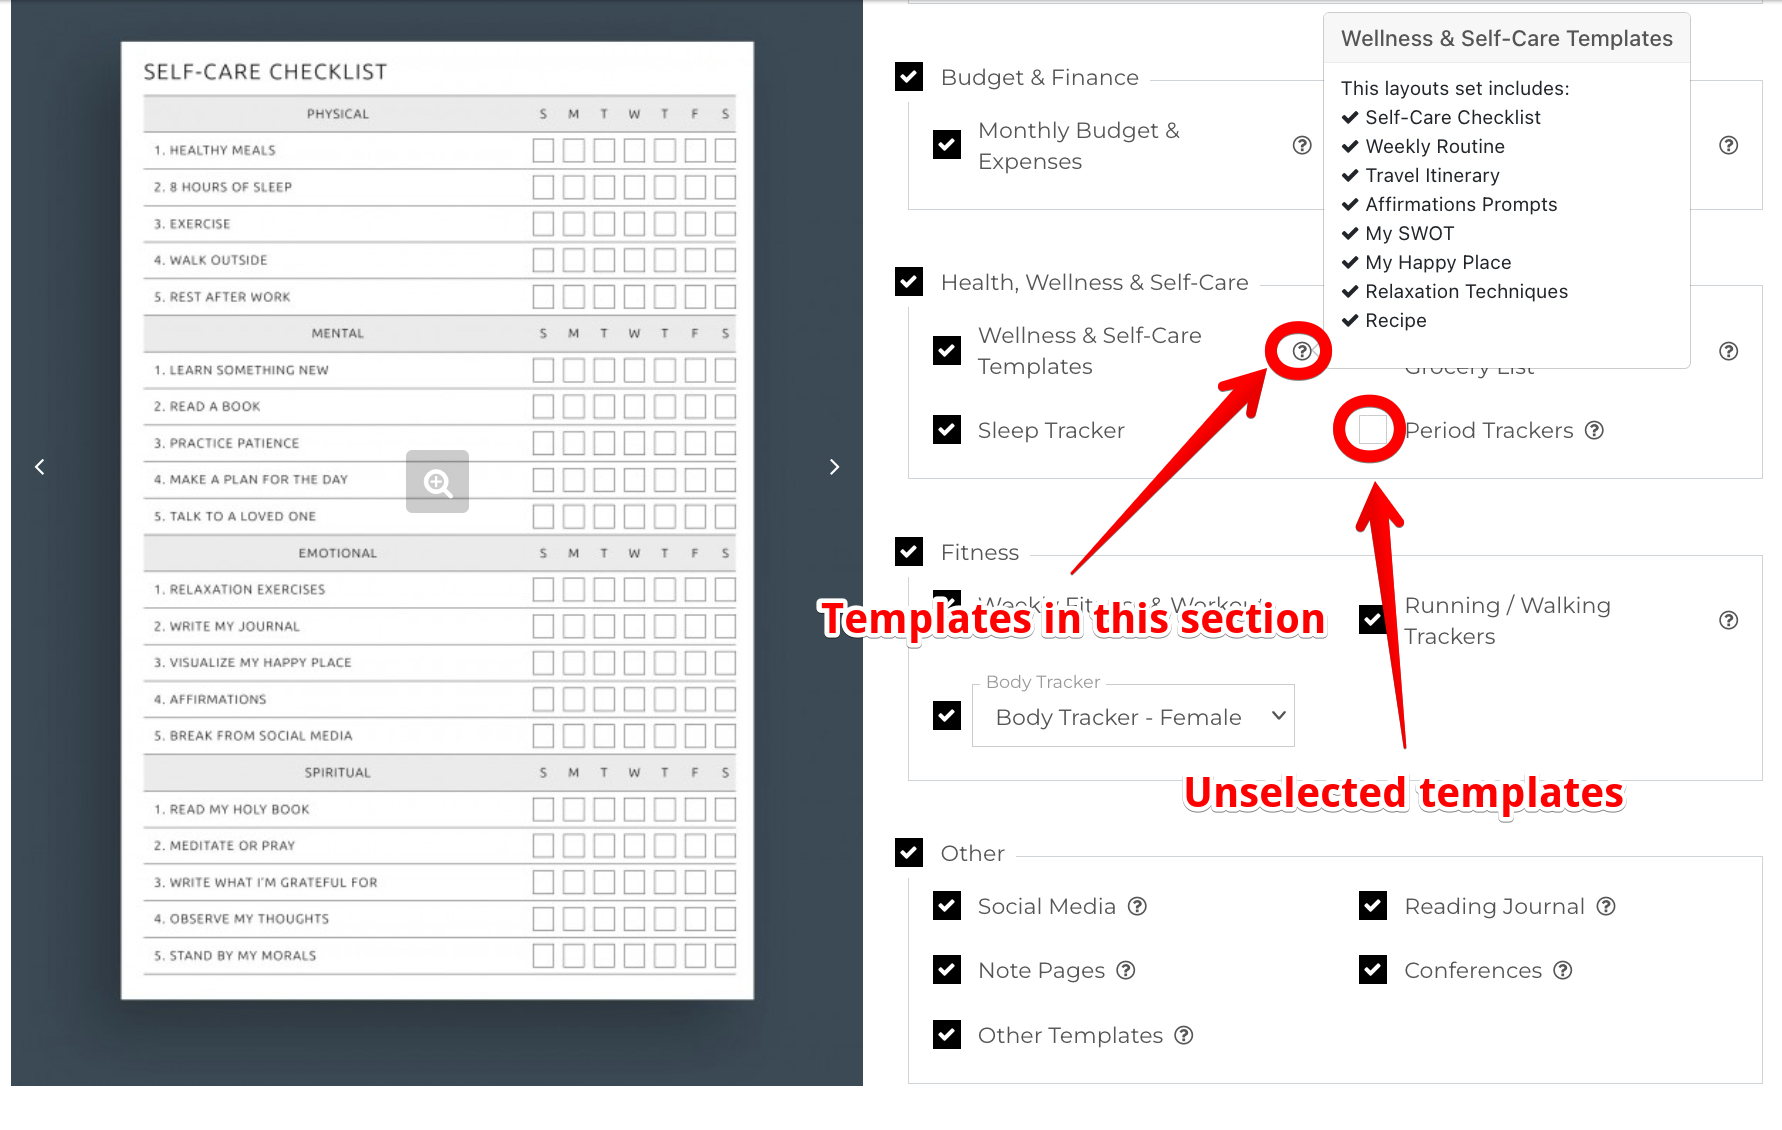
Just below, we see sections with other special layouts. Click on ? to see what exactly layouts available in this section. Uncheck what you don't need.
Finally, press "Download". File generating takes a few minutes. The next step is uploading PDF to iPad storage.
Our Planners are compatible with all applications for PDF annotating. But the bigger part of users prefer these apps.
For iPad:
If you have Android device to, look at these applications:
Just click on App Name to learn more about each app.
However, the best solution for convenience and portability is to use the planner with your iPad or any other tablet paired with a stylus that supports handwriting. This is not actually matter what application do you use. They have a similar functionality.
We recommend using full planners, but if you need only several pages from the planner, look at this manual
Planner templates come in handy for all occasions, from creating a to-do list to planning big business tasks or developing a detailed meal plan and grocery list for the family. You can easily upload each template. If you need only several templates from planner, use any free PDF Splitter. For example, this one.
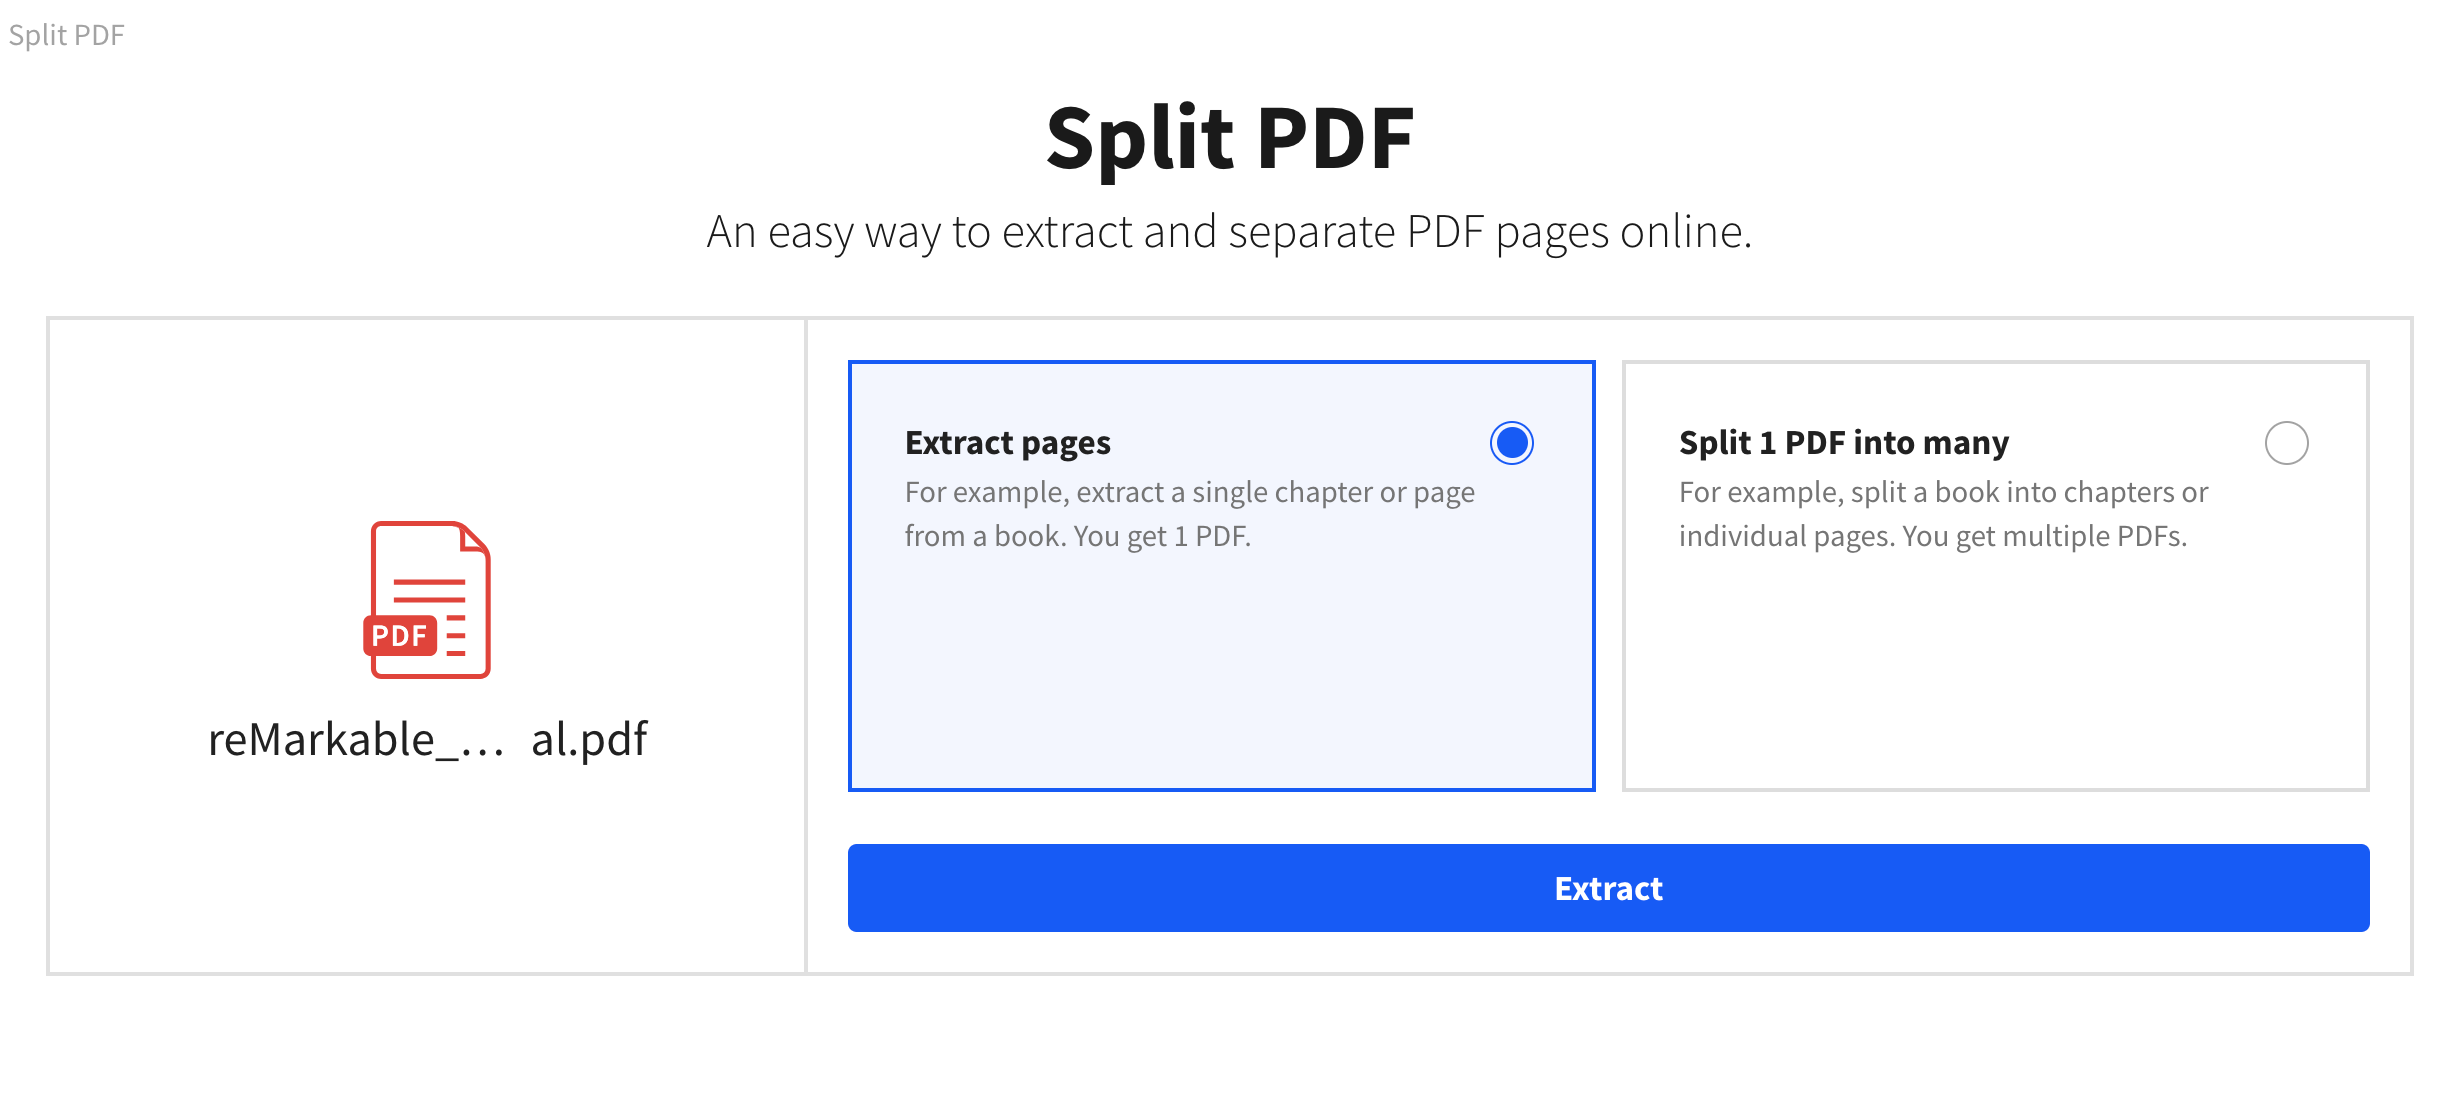
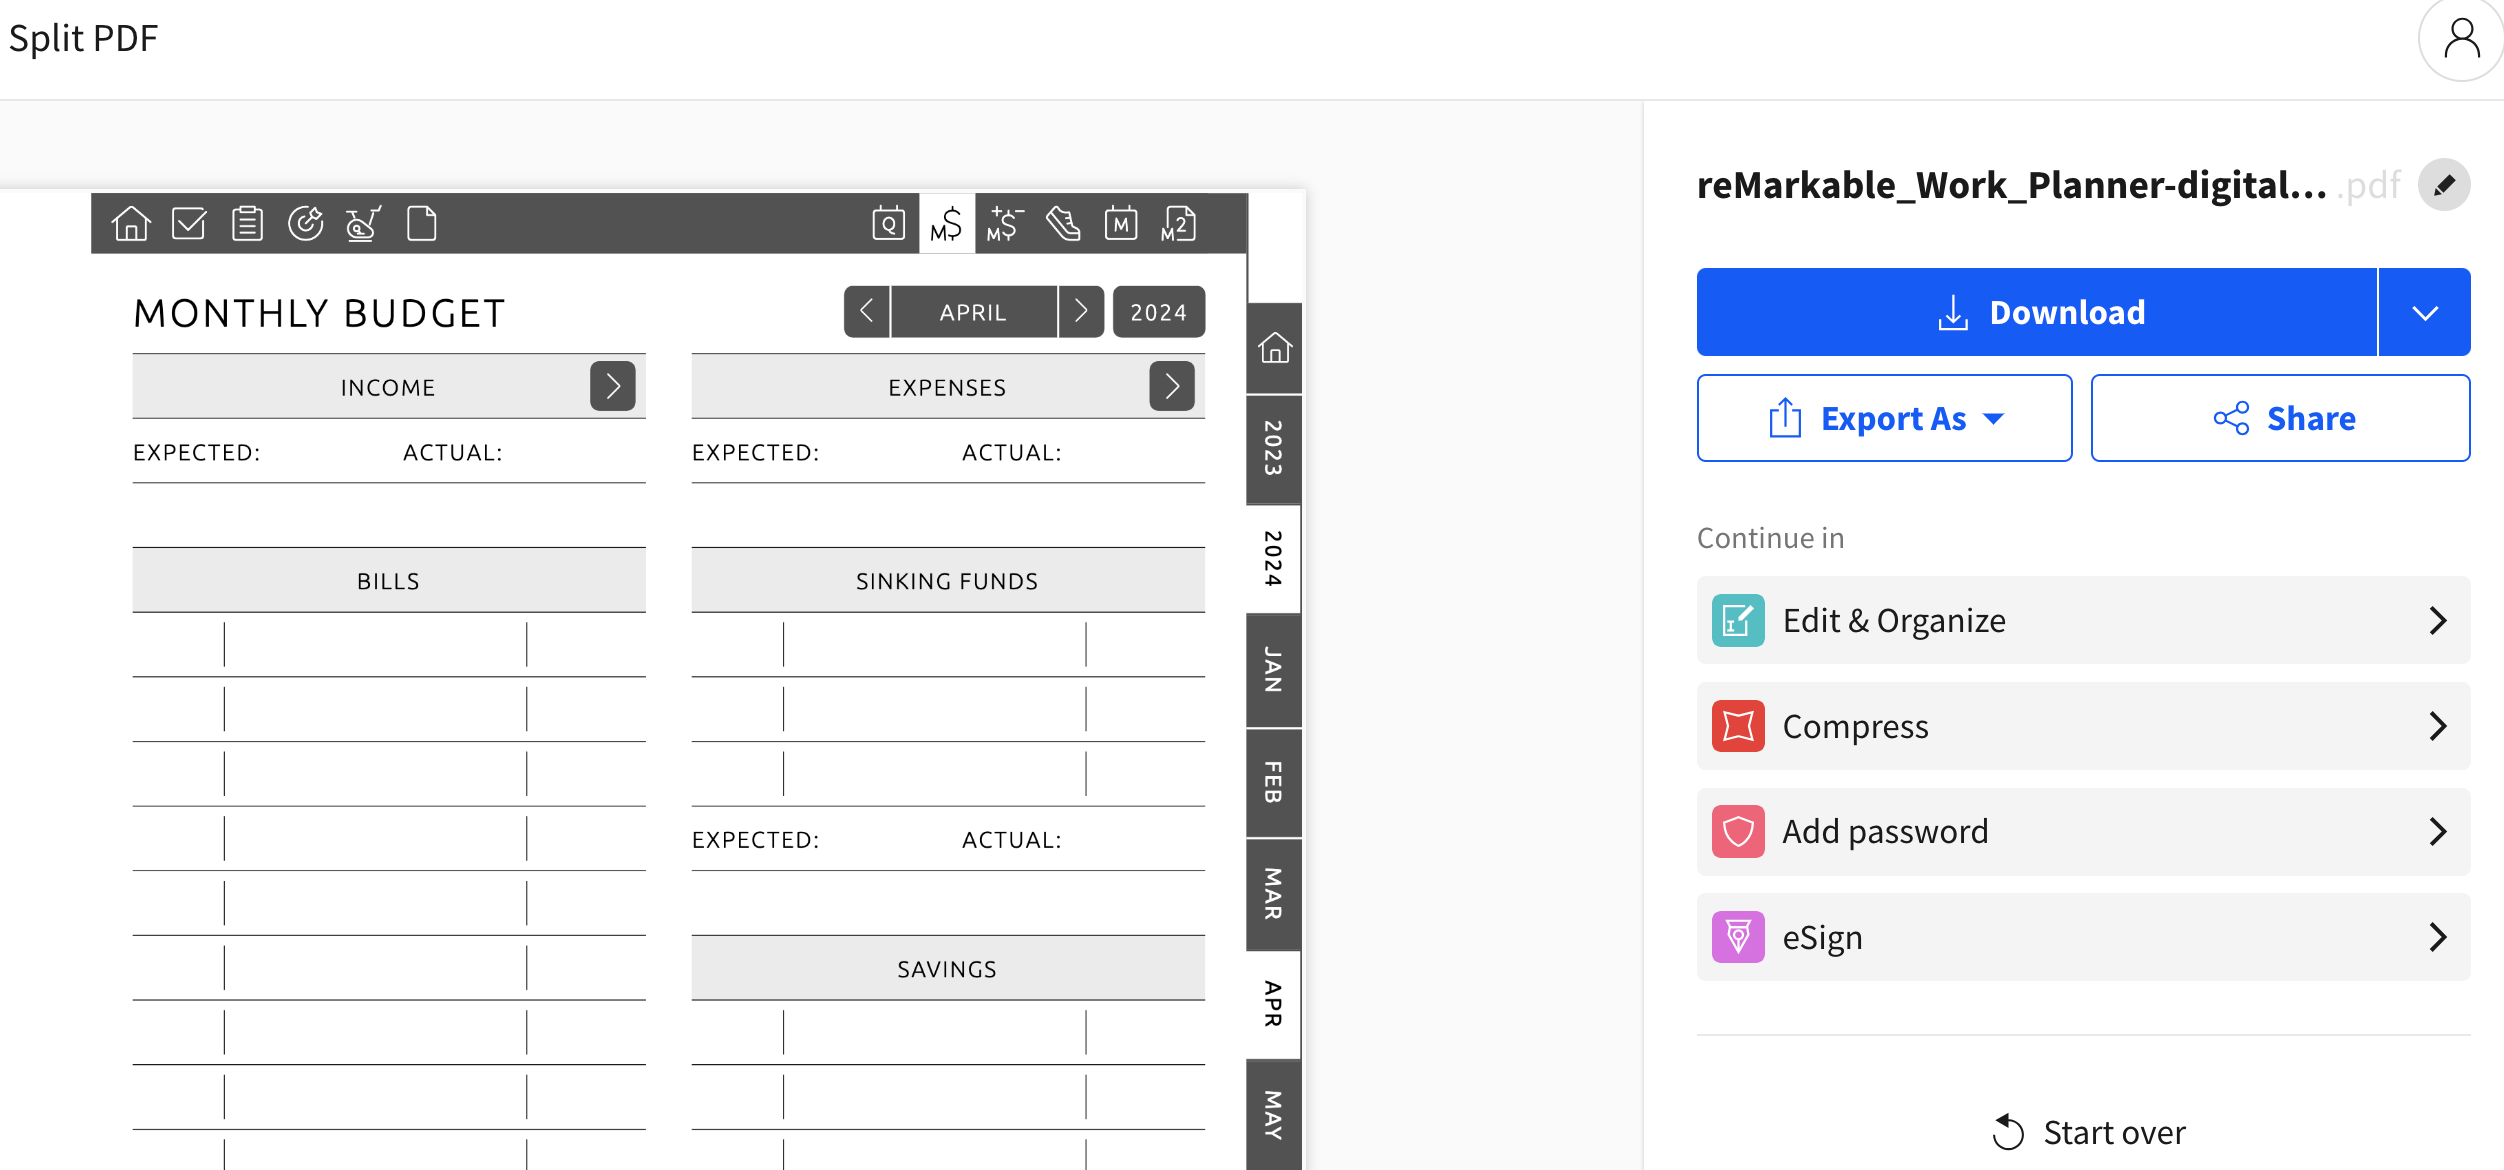
So, upload planner pdf PDF and choose "Extract pages" option.
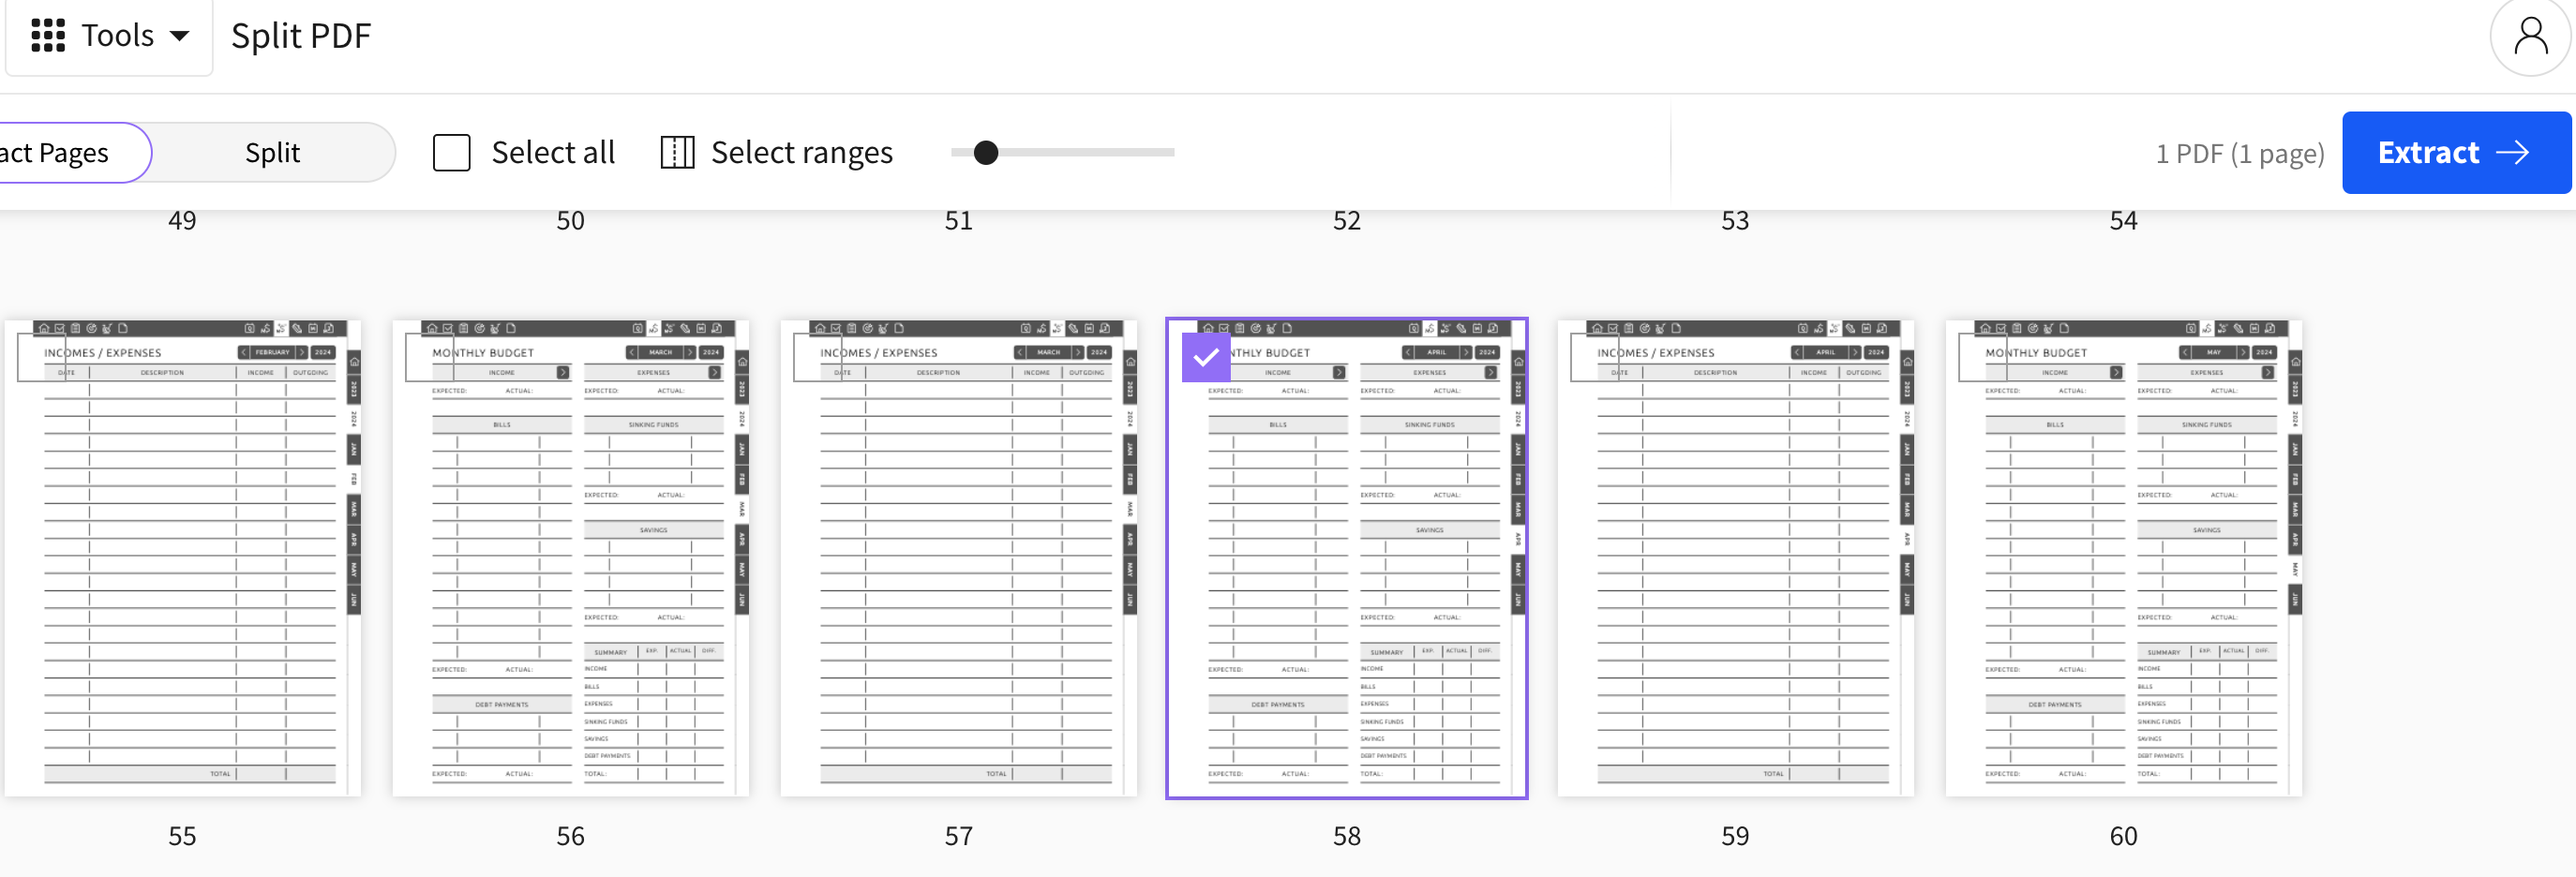
Select page and click "Extract".
Click "Download" and import the file to your device.
We hope this manual was useful for you.
Uploading a digital planner to your iPad involves a few straightforward steps. Here's a general step-by-step guide for GoodNotes, Notability and Noteshelf.
Firstly, ensure that the digital planner file (typically in PDF format) is saved to your computer, cloud storage, or received via email.
Transferring the Digital Planner to your iPad:
Using iCloud Drive or other cloud services (e.g., Dropbox, Google Drive)
- Upload the digital planner file to your preferred cloud service from your computer.
- On your iPad, open the cloud service app where you uploaded the planner.
- Download the file to your iPad.
Using Email
- Email the digital planner file to yourself from a computer or another device.
- Open the email on your iPad and download the attachment.
Using Airdrop (for Mac to iPad)
- Ensure both devices have Airdrop and Bluetooth turned on.
- Right-click on the digital planner file on your Mac and choose "Share" then "Airdrop."
- Select your iPad from the available devices.
- Accept the file on your iPad when prompted.
How to open file Notability or GoodNotes?
- Open the app of your choice.
- Tap on the import or + icon (this might vary slightly depending on the app).
- Locate and select the digital planner file you transferred to your iPad.
- The digital planner will now open in the app, and you can start using its interactive features.
That's it! With the digital planner now on your iPad, you can seamlessly plan and organize on the go.
This is several reasons why you can't navigate throw the planner using hyperlinks.
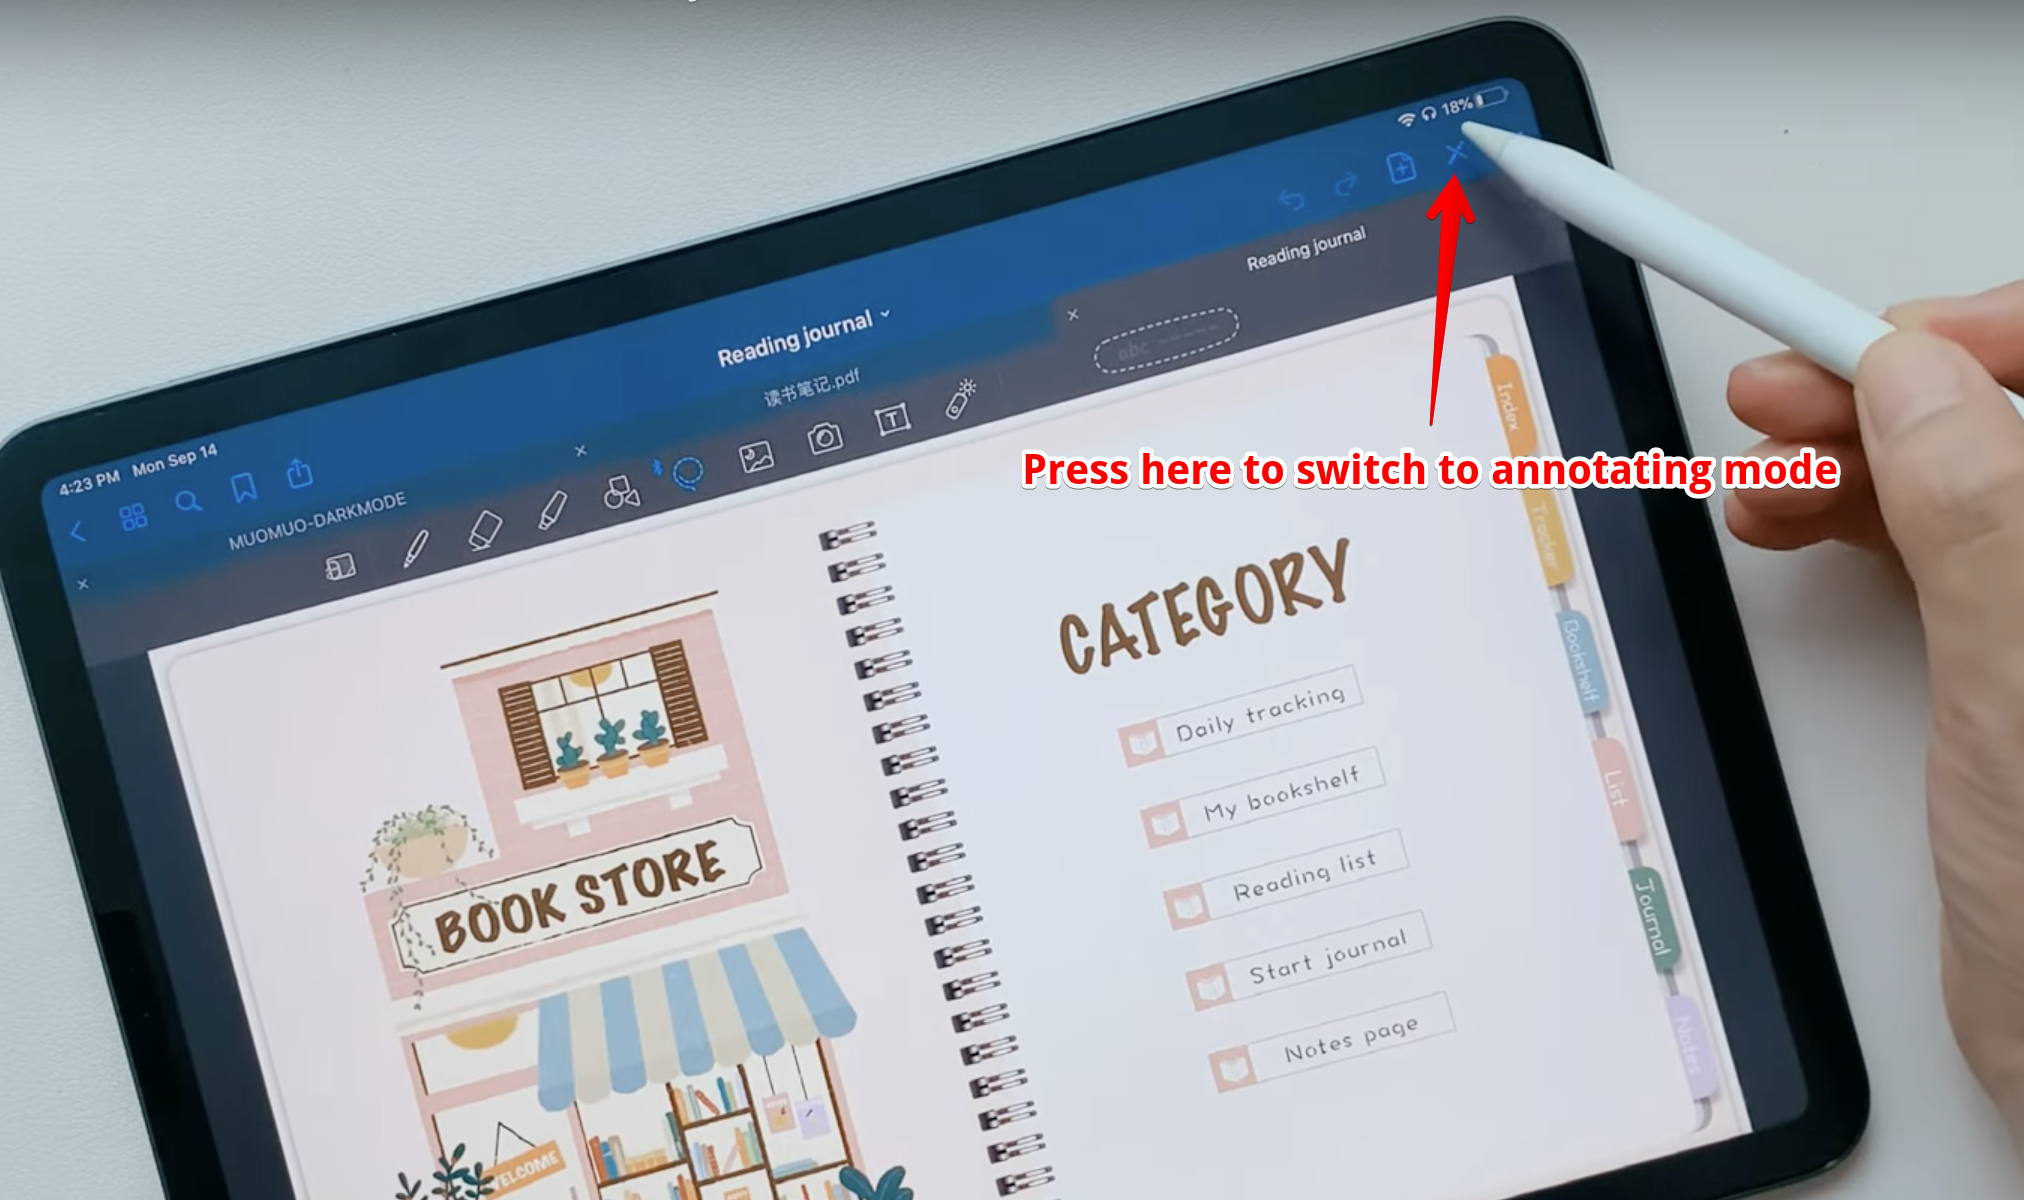
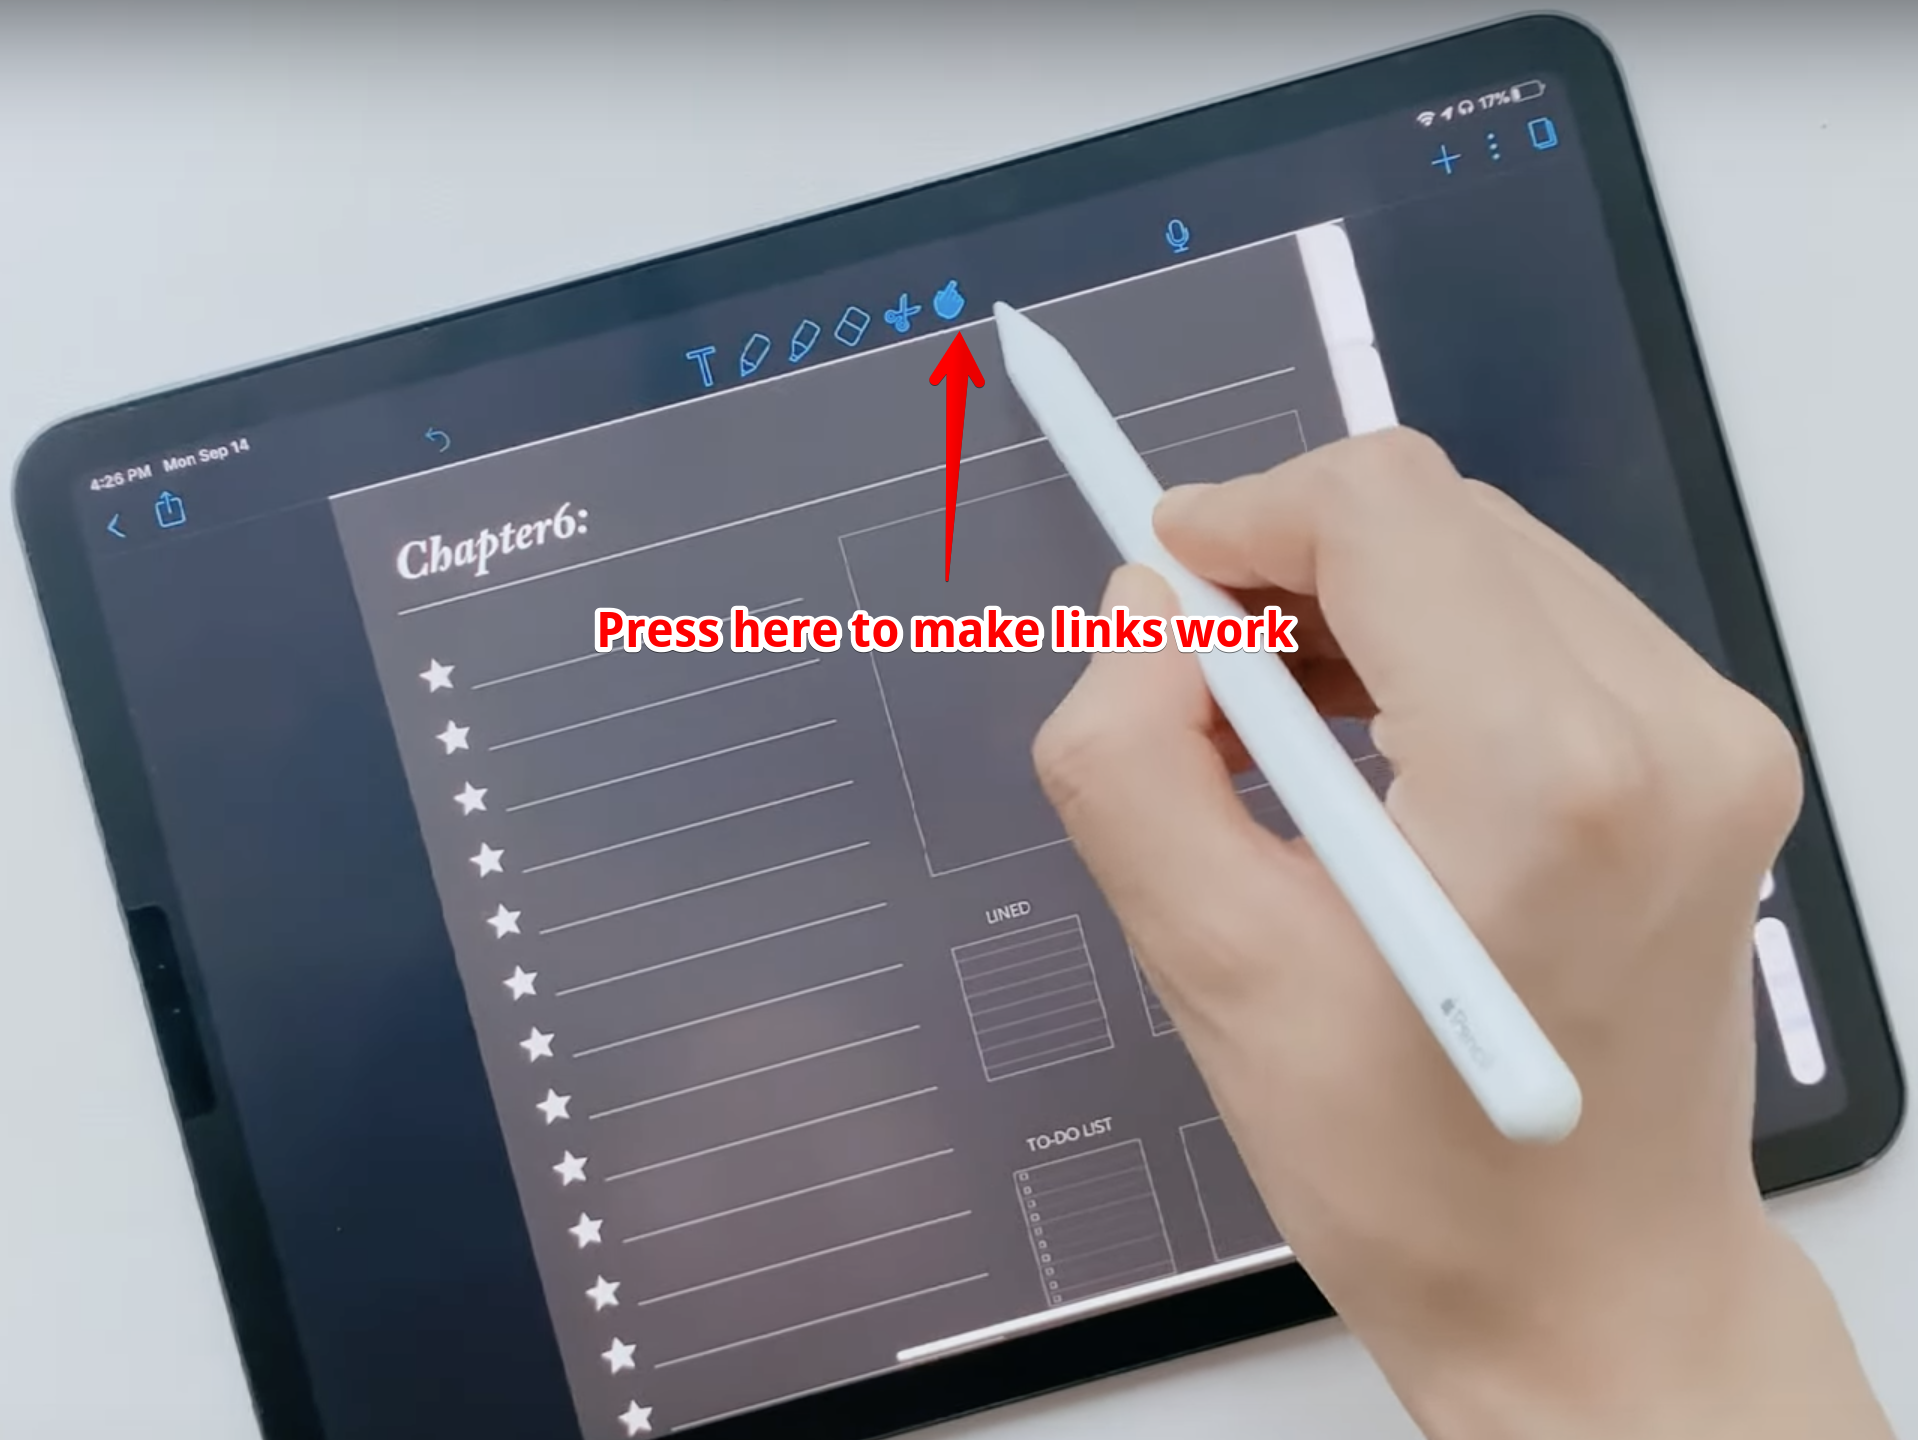
At first, please be sure you are in the annotating mode. Hyperlinks don't work in editing mode.
For GoodNotes just click here like on screenshot. Sidebar have to be hidden. In this mode, you can draw on PDF and use links. Also, you can press and hold link 3 seconds then select option "Open link".
In Notability we have the same button. Just press it.
The second reason might be associated with downloading issues.
- Please download planner to computer storage again using Web Browser like Chrome or Safari;
- Open it and try to click on links.
If links work properly, please just import file to device again.
If links work on PC, but they are unlickable on iPad, please try another trick:
- Download Planner and find it on computer disk (in most cases, the file is being placed to "Downloads" folder).
- Click on it using right mouse button. Choose "Compress".
- You'll see a new zip file that contains your planner.
- Import it to the device and open.
- Device will extract PDF from zip archive and open it.
- Hyperlinks must work properly.
We hope this manual was helpful for you.